

Yarn Substitutions Part 1: Weight and Gauge
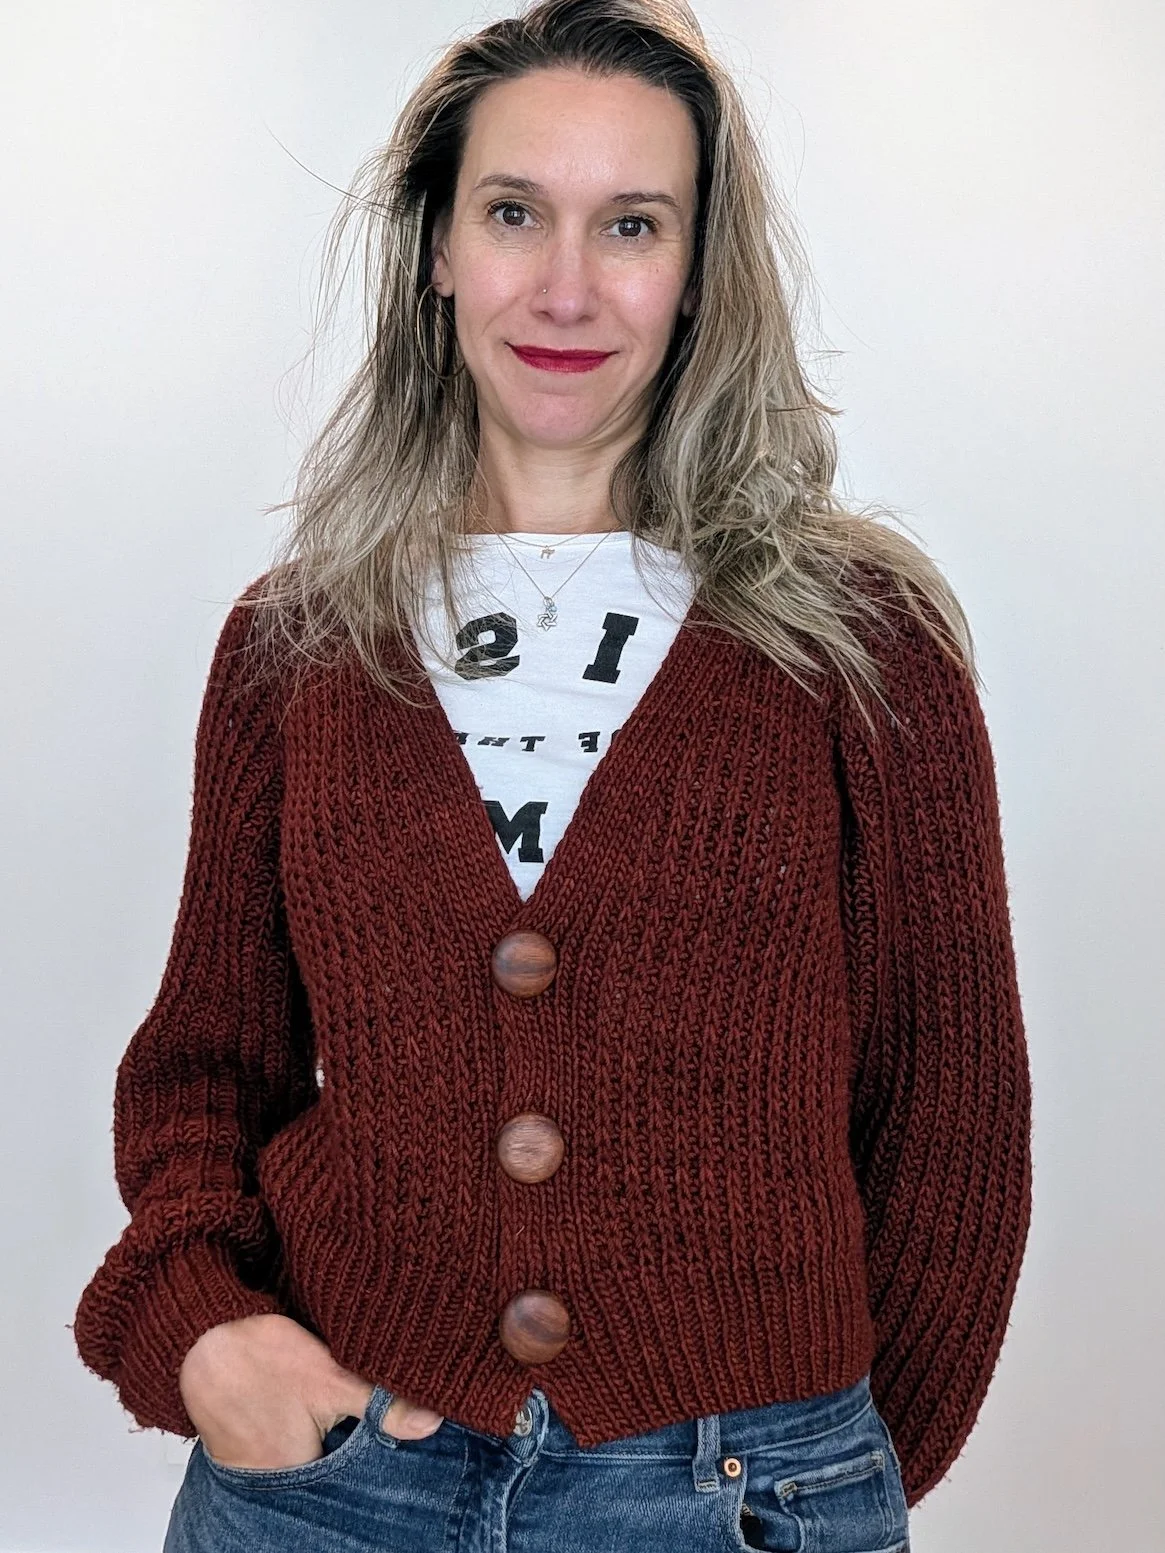
I knit this sweater using DK weight yarn instead of worsted, but I matched the gauge. The result was an airier, lighter sweater.
Substituting yarn is essentially a matching game between two things: the thickness of the yarn (its weight category) and the density of the final fabric (the gauge). When you change the yarn weight, you automatically shift either the physical size of your project or how the fabric drapes. While there are several other factors that can impact yarn substitutions, such as fiber content, those topics will be covered in a separate post.
How yarn weight impacts your knitting.
If you use a lighter yarn than the pattern calls for, you will get a less dense, more flexible, drapier fabric. If you adjust your needles to keep the fabric density consistent, but don't change the pattern math, your finished item will turn out smaller, and you’ll use less yardage.
If you use a heavier yarn than the pattern calls for, you will get a denser, stiffer fabric. If you adjust your needles to keep the fabric density consistent, but don't change the pattern math, your finished item will turn out larger, and require more yardage.
Reading the Clues for Fabric Density
How do you know what density the designer actually intended? You have to look at where the recommended yarn sits within its specific category. Every yarn weight group has a spectrum. For example, you can have a light DK or a heavy DK.
You can find the designer’s intent by looking at the recommended needle size and the yarn’s thickness clues:
Needle Size: If the pattern uses a needle on the smaller side of the sizes recommended for that yarn weight, the fabric is meant to be dense and structured. A larger needle means a looser, airier fabric.
Thickness Clues: A higher Wraps Per Inch (WPI) count or more yardage per 100g means a thinner yarn. Fewer wraps or lower yardage means a thicker yarn.
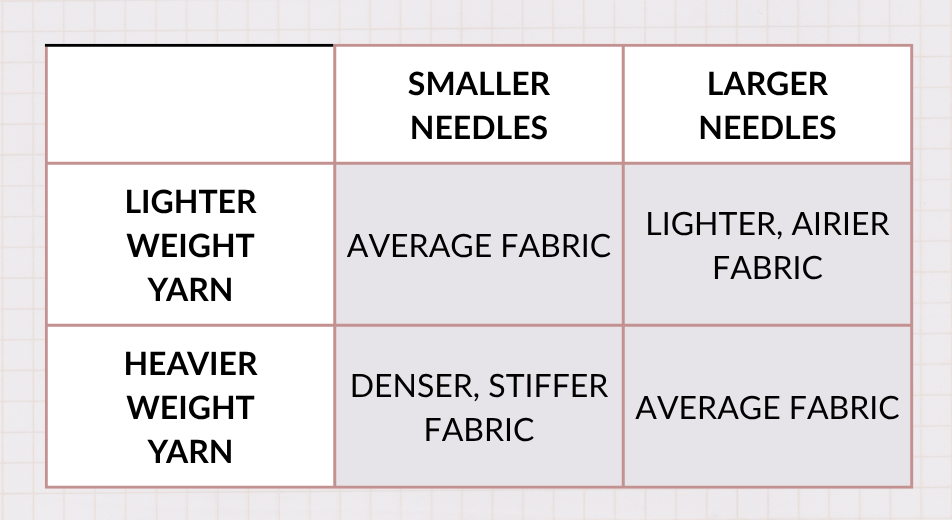
When you combine these clues, you get a clear map of the target fabric:
The Weight Factor: Shawls vs. Sweaters
The overall size of your project changes how weight behaves. For smaller items or a baby sweater, a slight change in yarn weight won't make much of a difference.
For large items, physical weight matters. The larger a piece is, the more gravity pulls down on it. For a shawl, this might not bother you. A slightly larger, heavier shawl just means more dramatic drape. And if I’m being honest, that’s a bonus for me.
For a fitted sweater, heavy sag can ruin the fit. A tighter, denser gauge adds excellent structural stability to prevent stretching, but it also alters your sizing. To keep the sweater exactly as the designer intended, your best route is to match the fabric density and use simple math to adjust the stitch counts.
That’s the theory. Now, let’s talk specifics.
Step 1: Swatch for the Right Fabric
Knit a swatch with your chosen yarn, experimenting with needle sizes until the density and drape feel right to you and closely match the character of the original design. Block the swatch in the same manner you plan to block and wash the finished item.
Step 2: Find Your New Gauge
Measure your blocked swatch over 4 inches, then divide by 4 to get your exact stitches per inch and rows per inch. Do the same for the pattern's original stitch and row gauge.
Example: Your yarn gives you 5 stitches per inch and 7 rows per inch. The pattern calls for 6 stitches per inch and 8 rows per inch.
Step 3: Calculate the Conversion Factors
Divide your new gauge by the pattern's original gauge for both stitches and rows to find your magic multipliers.
Stitch Multiplier: 5÷6=0.833 (Your new stitch count is roughly 83% of the pattern's.)
Row Multiplier: 7÷8=0.875 (Your new row count is roughly 87.5% of the pattern's.)
Step 4: Adjust the Numbers based on the project type.
If you are knitting a shawl: Shawls are incredibly forgiving because they don’t have to fit precisely. You have two ways to handle the substitution depending on how much control you want over the final size:
Option A (Do a little math): Use this if you want to keep the shawl as close to the original dimensions as possible.
If your yarn is thicker: Multiply the pattern's repeat counts or total rows by your row multiplier (0.875). You will work fewer repeats of the pattern sections, stopping once the piece reaches the original target measurements.
If your yarn is thinner: Add extra pattern repeats or extra rows to build the shawl out to its full intended size.
Option B (Just go for it): Use this if you are happy to let the yarn dictate the final size, following the pattern exactly as written without any math.
If your yarn is thicker: Your shawl will turn out larger and heavier, giving you extra drama and drape. Just ensure you have extra yardage on hand, as a larger footprint requires more yarn to finish the final rows and bind-off!
If your yarn is thinner: Your shawl will turn out smaller, daintier, and more lightweight. It works beautifully for turning a heavy winter wrap pattern into a delicate spring accessory, though you may use less total yardage than the pattern lists.
If you are knitting a sweater: Sweaters need to fit well, so you can't just wing it. Here are two easy options to make sure yours turns out the right size:
Option A (Do a lot of math): Multiply the key stitch counts in the pattern (cast-on, bust, sleeves) by your stitch multiplier (0.833) to know exactly how many stitches to work. To keep the vertical proportions right—like yoke depth, armhole shaping, and waist decreases—multiply the pattern's row counts or length instructions by your row multiplier (0.875) so your sweater doesn't end up too long or too short.
Option B (Pick a different size): Look at the pattern's schematic measurements. Multiply the target inches you want by your new stitch gauge (5 stitches per inch) to find the total stitch count you need for the bust. Then, simply look through the pattern sizes to see which size matches that stitch count. Once you pick the size that matches your width, use your row multiplier to adjust the vertical sections as you knit to ensure the length matches your body.