

Seaming: Mattress Stitch

The mattress stitch is my favorite technique for joining knit fabric, but finishing isn't one-size-fits-all. There are multiple ways to work this seam depending on what you’re making.
This breakdown covers the basic steps to create an invisible join, along with the structural choices you can make regarding seam strength, bulk, and placement.
Step 1: Read Your Fabric First
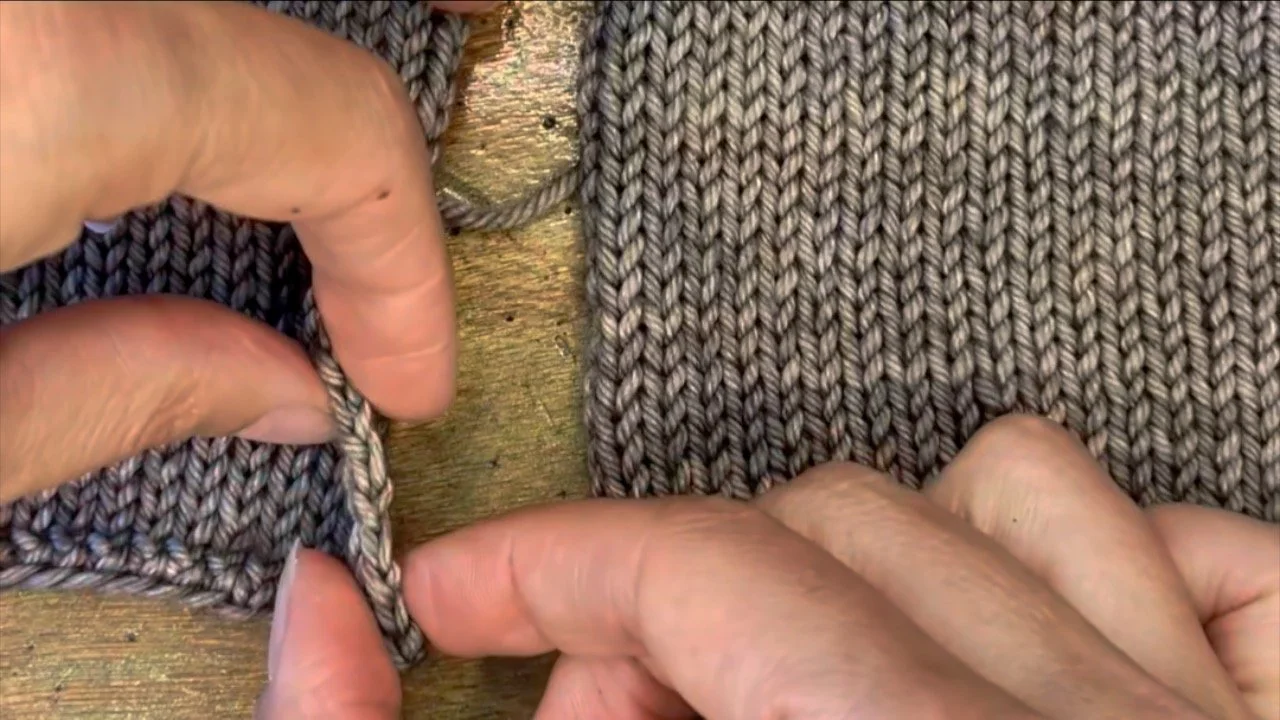
Before you pick up your darning needle, take a close look at your edges. You’ll notice the very edge stitch can look a little bit messy or loose, while the column of stitches just one row in is much more consistent. Neither option is wrong to use, but they give you different results.
For a stronger, highly uniform seam, work your stitches one column in from the edge. This leaves a small seam allowance on the inside. While thiscreates a larger bump of fabric on the inside of the garment, it also keeps the outside perfectly neat.
If you prefer to minimize the bulk, use the very edge stitches. This keeps the inside of the seam completely flat, though the final join might look just a little less perfect on the outside.
Choose the balance of bulk versus neatness that makes sense for your specific project.
Step 2: Set the First Stitches
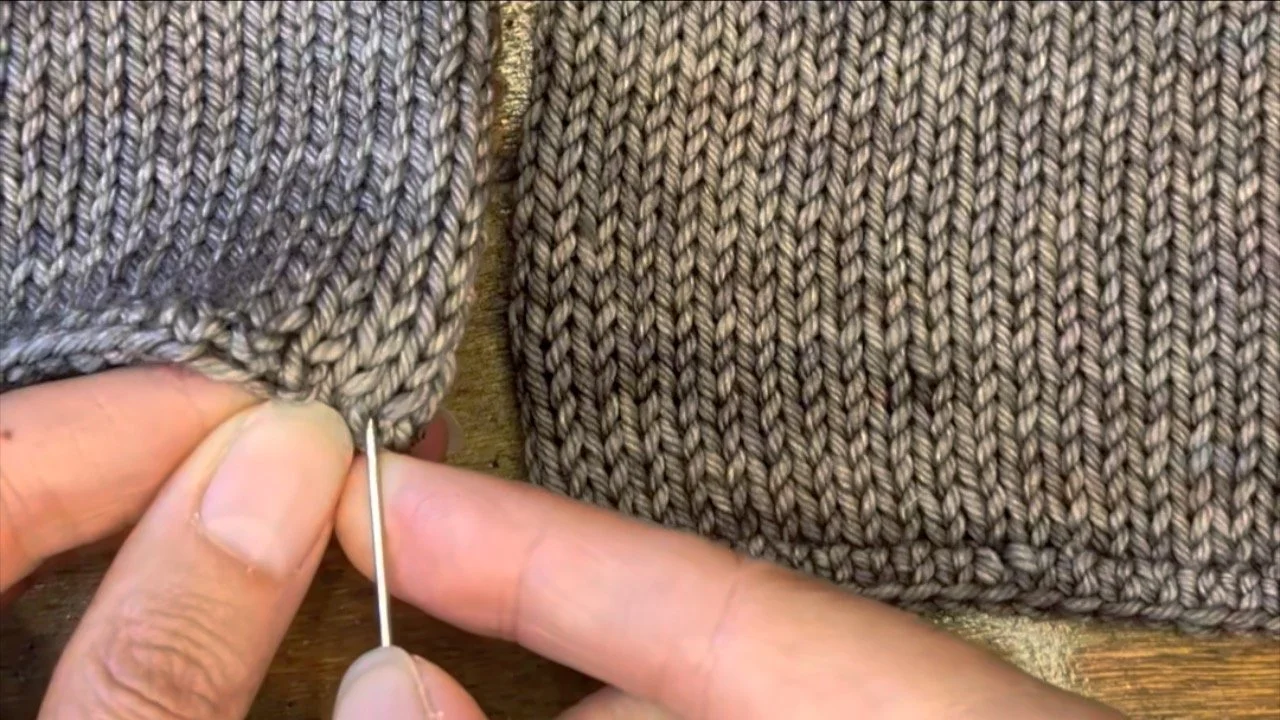
Thread your darning needle with your seaming yarn and start at the bottom. It doesn’t matter which piece of fabric you start on.
Insert your needle directly into the center of the bottom stitch on the first piece. Slide the needle under the horizontal bump sitting between that stitch and the one directly above it, then bring the needle out through the center of the stitch above.
(tip: that "bump" is actually just the top loop of the stitch you entered!)
Move over to the second piece of fabric and mirror that exact same movement: into the center, under the bump, and out the stitch above.
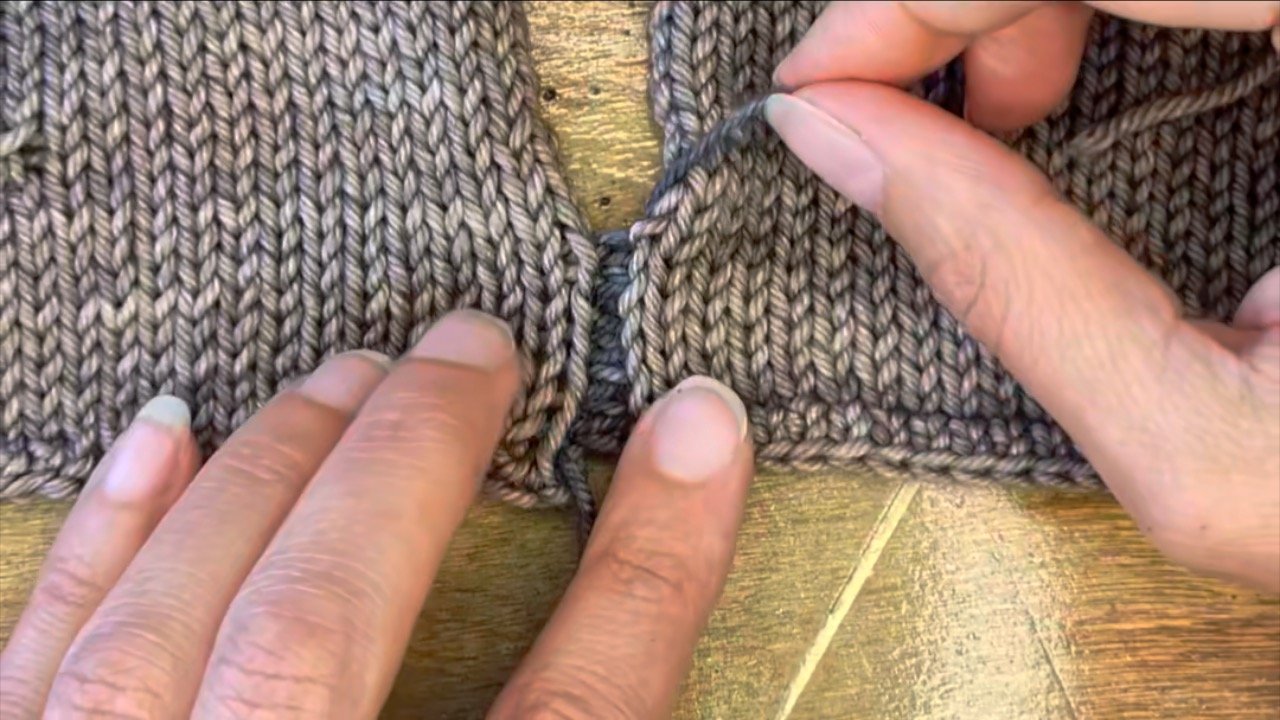
Step 3: Work the Repeats
To keep moving up the fabric, go back to the first side. Always insert your needle into the exact same stitch your yarn last came out of so you don't accidentally skip a row. Pick up the bump, come out the stitch above, and mirror it on the second side.
As you work your way up, you also have a choice in how many bumps to pick up at once.
One bump at a time gives you maximum row-by-row precision and keeps the seam highly flexible, matching the natural elasticity of the knit fabric. Two bumps at a time speeds up the process significantly and creates a very firm, sturdy join that works well for heavy garments.
Step 4: The Zipper Pull
As you work, keep your tension loose so that your seaming yarn looks like a loose ladder holding the two pieces together. Once you have worked through about three or four stitches on either side, grab the yarn and gently pull it taut. The two sides will zip together, making the seaming yarn disappear completely.
A Quick Note on Tension
Be mindful not to pull too tight, and avoid working too many stitches before you do your zipper pull. If you wait too long or yank the yarn too hard, the seam can become rigid and lose its stretch, which can impact the drape of your knitting. Pull it just enough so the fabric sits snugly together without gathering or puckering.
Want more straightforward knitting breakdowns? Sign up for the newsletter to get practical tips and tutorials delivered straight to your inbox.